Frequently you need to create screenshots of your desktop for different usages as demonstration for your job or for educational utilisation. You need to annotate them and highlight the important parts to emphasise further and attract the attention of the audience to certain parts of the demonstration. This is "How to" use the Microsoft Windows Paint facility to achieve this goal.
Do not use the sniping tool's pen or highlighter at all.
Save Your ShotSave your work in an ongoing task folder that you create.
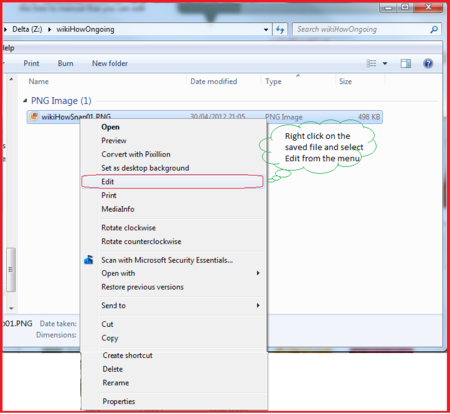
Edit your ImageRight click on the image file and select "Edit" from the menu. Microsoft Windows Paint opens your screen shot for editing.
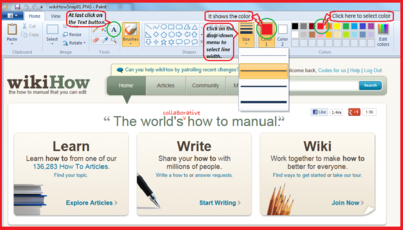
Select ColourSelect the color of text from the palette. Next to it there is the drop-down menu for hickness of lines for drawing shapes.
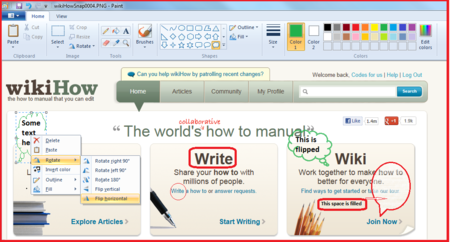
Insert text. At last, click on Text Tool button (shown as A) to insert text on the desired place.
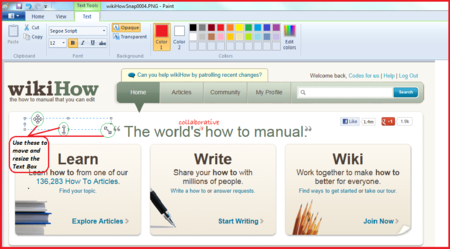
Select FontsSelect fonts. First click on the desired point for inserting the text to open the Text Insertion Box (box means that dotted rectangle). When the text insertion rectangle opened decide for the font size, style and face.
Move and Resize Text BoxUse "Move" cross handle to move the text box around. Use "Resize" double head arrows to resize the text box.
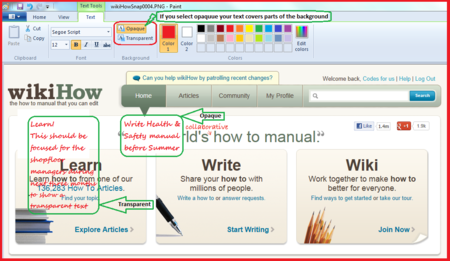
Decide for Transparency or OpaquenessDecide if your text should hide part of the background image (opaque text box) or show it (transparent text box).
Write your text. After deciding on font, transparency and finished your typing, before you click out of the text box, You can resize the box, move it around, change fonts, color, new line feed just any like a text editor. Once you clicked out of the box the format of the box will be frozen and can't be changed. You can "undo" it if you are not happy by pressing "Ctrl + z" on your keyboard or at the top of the Paint's GUI.
Surround the texts by shapes. You can use different shapes, arrows, and speech bubbles to surround your text.
Decide for the color and thickness for your desired shapes.
Move or resize shapes to desired location and size.
Use shapes and Speech BubblesRotate or flip shapes to point to the right directions.
Before clicking out of the shape box, right click inside the box and select desired orientation, outline and fill.
Make a Frame for Snapshots
Use your artistic talent and practice to discover and improve the finished job. For example frame your snapshot to contrast it with the background.
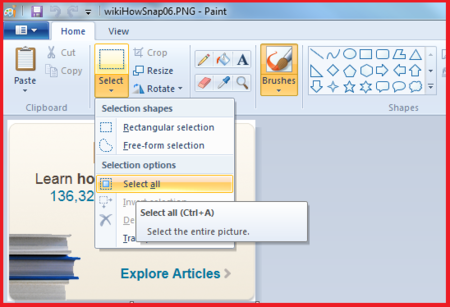
Open Your ShotOpen your Shot in the Windows Paint.
Select AllSelect All from the drop-down menu.
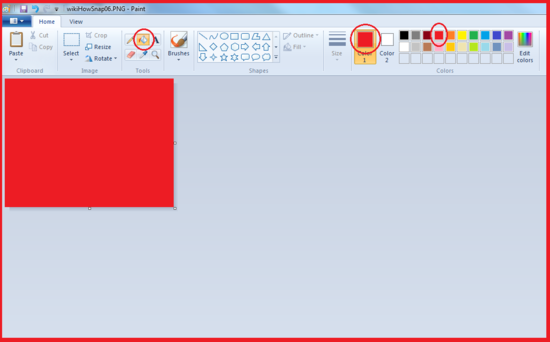
Cut Snapshot and Resize the BackgroundClick on "Cut" from menu or "Ctrl + X" from your keyboard. Make the blank background larger using "Resize" arrow.
Select ColourSelect a colour of your choice (here red) and take the "bucket" from the menu and click it on the white are to be filled with red.
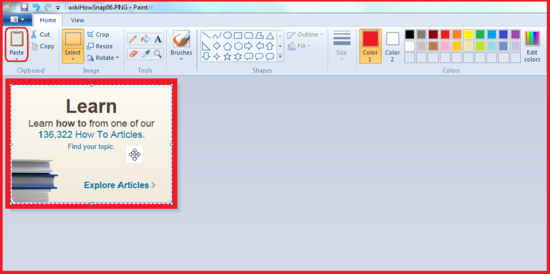
Paste the Shot Back and Adjust the FrameClick on Paste to put your snapshot back on the frame. Move the snapshot and resize the red frame for a desired frame size.
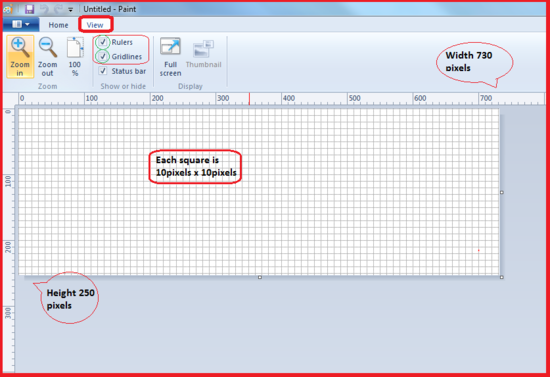
Use Rulers and Gridlines
Use "View" menu to put rulers and gridlines on your work. If you like to meticulously position your annotation on the prepared screenshots you might be interested to add coordinates to facilitate and achieve that goal.
Put Rulers and GridlinesClick on "View" and check the required option boxes.
Draw Polygon and CircleDraw polygons (here a regular octagon) and circles considering their geometric properties.
To draw a circle put the curse in corner of one of the subdivisions. Read its coordinates from the horizontal and vertical rulers. Then move the cursor horizontally straight without changing its height, as much as you want its diameter. Next, move it vertically downwards equal to the value of the diameter. Then release the mouse cursor.
Know that the free "Paint" application that comes with your Windows has versatile capabilities that with some patience and practice could be used as a professional tool.