Please note: Software of this page remains your original file un-touched.
- There is no risk to them. Please do not select one of your original file names as the name for the target.
- If you do, still software leaves it safe, adds "_ZZ" to its tail before extension ".pdf" to keep the original file unharmed.
- Software of this page has no limitation on the number of files and size of the files.
- Please allow them enough of time if your files are large, in particular for high resolution PDF files.
Download the software from the download (click) page.
Put the "zip" file somewhere in a folder in your computer.
Use your favourite un-zip utility (I use excellent 7-zip free utility) to un-zip the software.
Please open the software folder.
Inside the folder, there is a "Software" folder containing Microsoft Visual C++ Redistribution 90 software.
If you already have this version of VC in your Windows, due to Windows automatic updates or installing as part of other software. You do not need to install it again. If you had to install it again, you can remove what ever files and folders it put in your root directory "C:"
Please note, if you do not press "Enter" button, when required, just the text already there goes into the process and might not give your expected result.
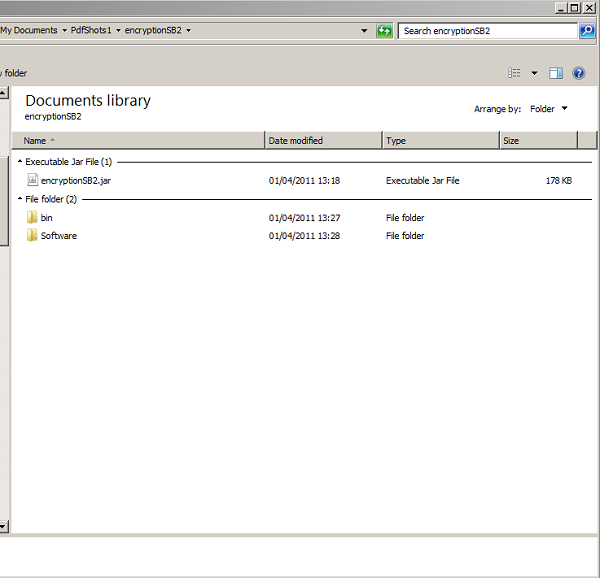
Double click on the "JAR" file encryptionSBx in the directory to open the software.
-
"Java Key Store" tab of the software is similar to pfx creator software described in visual help Howto11. (click) page. Please refer to that page for detailed description.
The only addition to that software is the "Jar Signing" utility.
- (click) for "Jar Signing"
- (click) for PFX creation from public/private keys pair
- (click) for PEM creation from PFX file
- (click) for DER creation from PEM file
- (click) for PEM creation from DER file
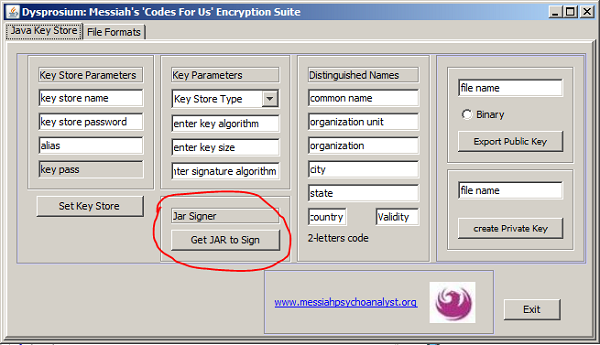
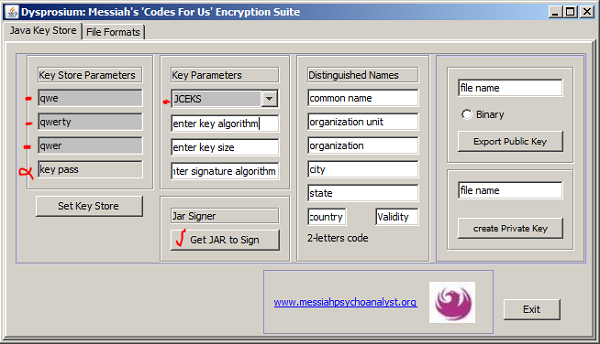
I already have created a Java Key Store as "qwe.keystore" in the directory, with password "qwerty". That key store has an entry with an alias "qwer" Key store type when created is "JCEKS"
I enter these values in the required fields and I press "Enter" such that the background of fields become grey. Now the key store is configured for signing my jar file.
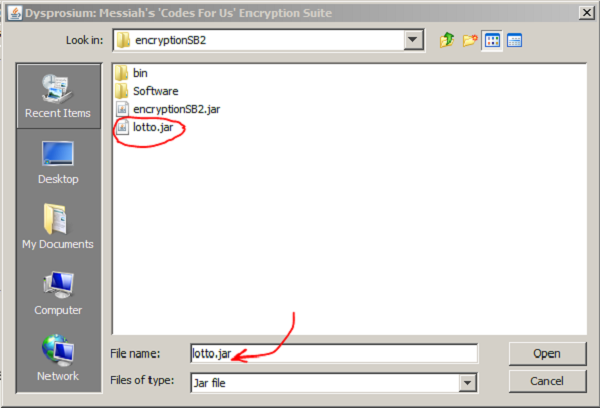
Click on the "Get JAR to Sign" button to open the file chooser and find the file that is to be signed. Then click on "Open" in the file chooser
Again the file chooser opens for you to brows to your "JDK" directory. You need to have JDK installed if you want to sign a jar. Please brows to folder that contains "Bin" that is "../jdk/bin" and that is enough.
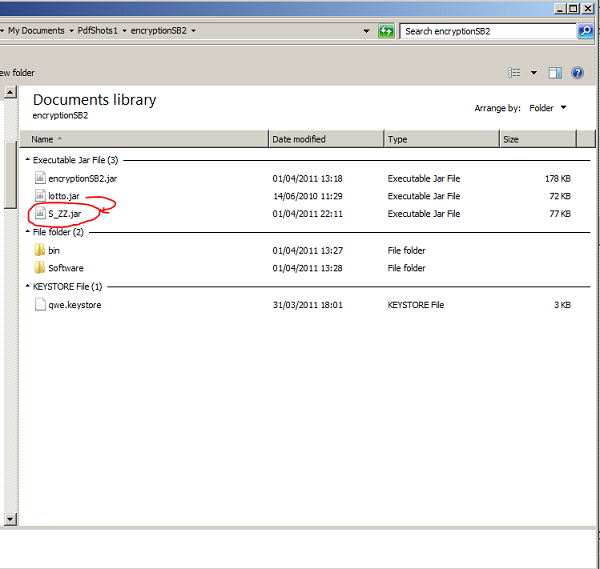
Immediately the signed jar comes into the directory as "S_ZZ.jar". Please change its name to your required name.
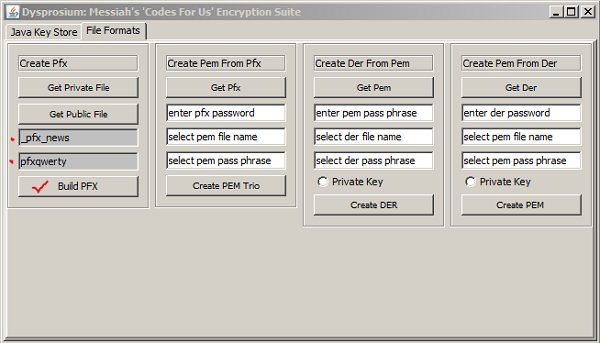
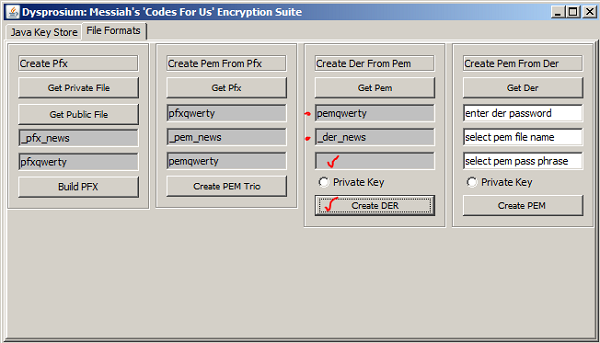
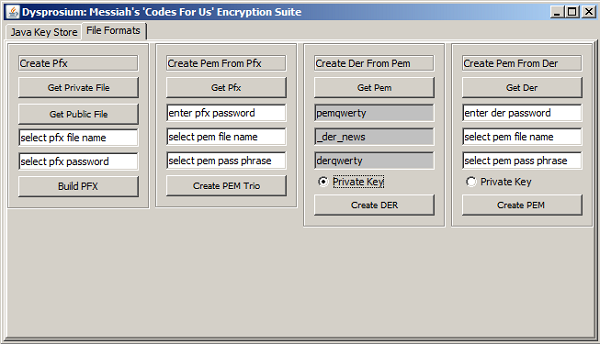
Now we click on the next tab for "File Formats" The first part is to create a PFX file.
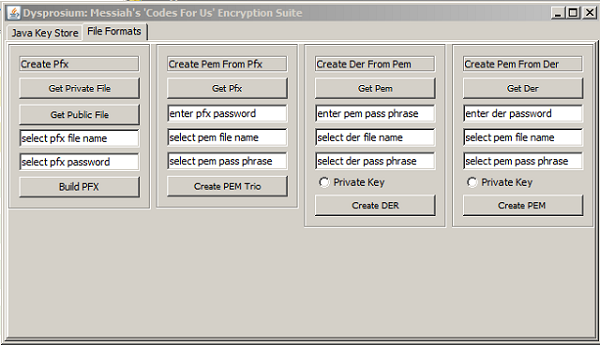
Assume I have my public/private key pair in the directory.
Now please click on "Get Private Key" button. Brows to it.
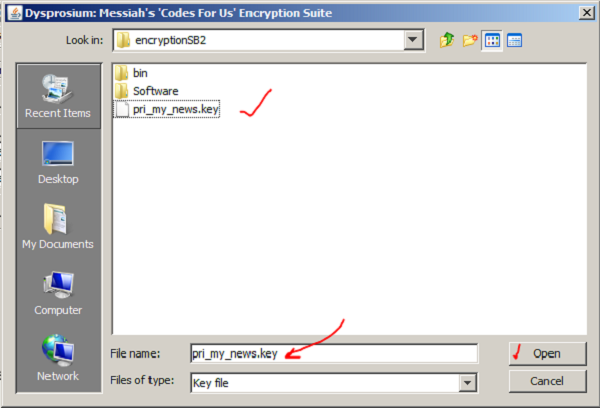
Then please click on "Get Public Key" button.
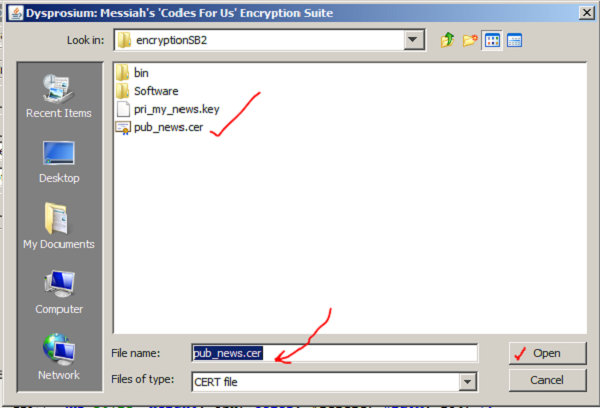
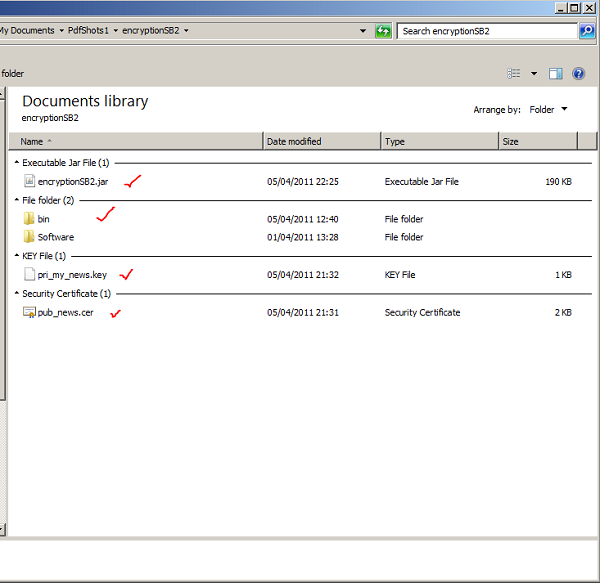
Fill the text field for your created PFX file name and for the password you intended for it. Then click on "Build Pfx"
PFX file is in the directory recognised by the Windows system as the certificate ready to be exported. You can double click on to check that the Windows prompt for its export as a correctly formatted certificate file.
There is a tmp_pkcs8.key as a by product that you need to change its name if you like to keep it as it will be overwritten next time that you use the software. It is a reconfiguration of your private key file.

In the same session or just by having a correct PFX file you can convert it to three ingredient PEM files: public (cert) key, private key and combined cert. Please click on "Get Pfx" button to brows to your PFX file.

Please fill text fields for the password of the PFX to be converted to PEM and the field for choosing a name for the PEM files to be created and select a password meant to be used later to import PEM cert file. Then, please click on the "Create PEM Trio" button.
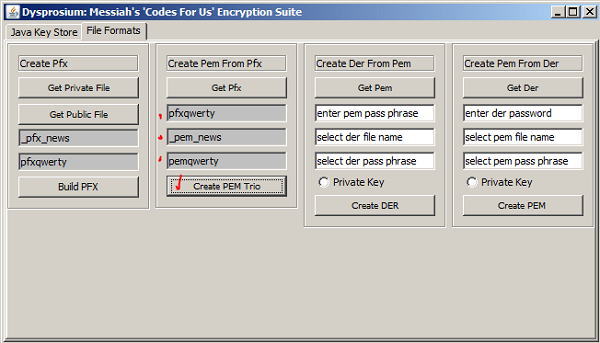
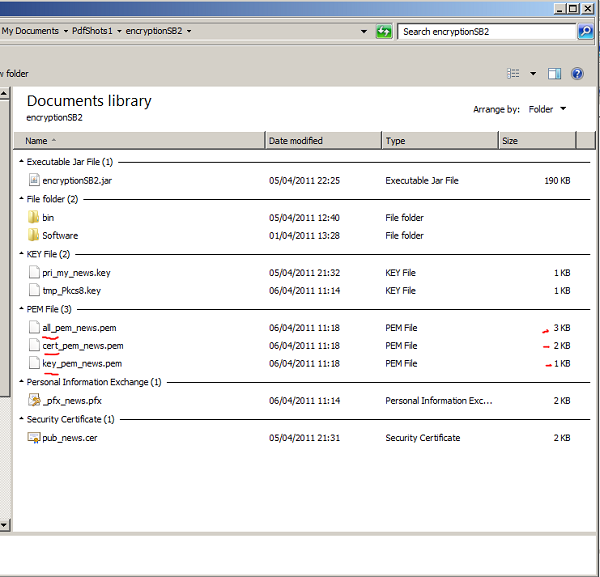
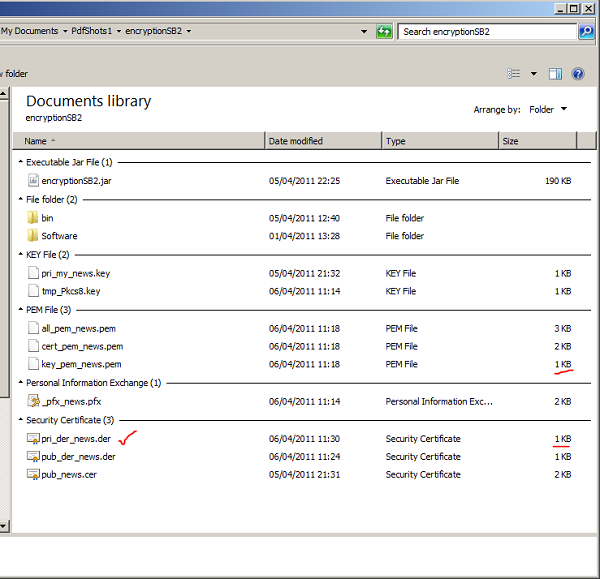
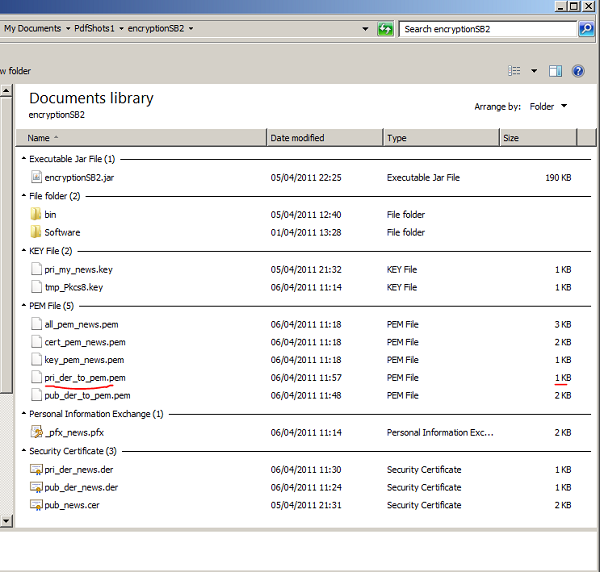
Now, We have three PEM files in the directory. PEM files are human readable. You can change the file extension to ".txt" to study their contents if you like.
Next, in the same session or later from any PEM file in correct format created by any means java key stores or otherwise, You might like to create DER formatted file..
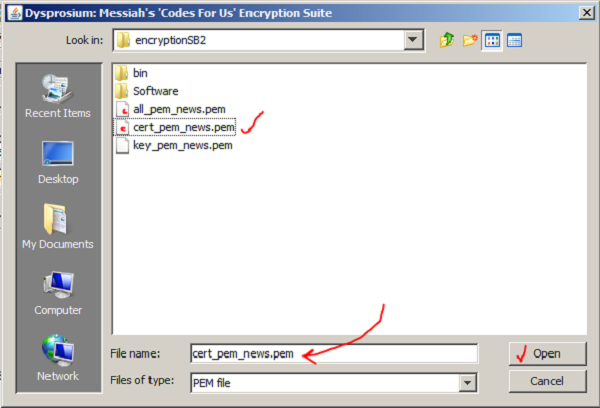
Click on "Get Pem" button to brows to its directory. I select a public key PEM cert or a a combined public/private file.
Please fill text fields for the PEM input file password and select a name for the created DER file and click on "Create DER" button.
DER file comes into the directory.
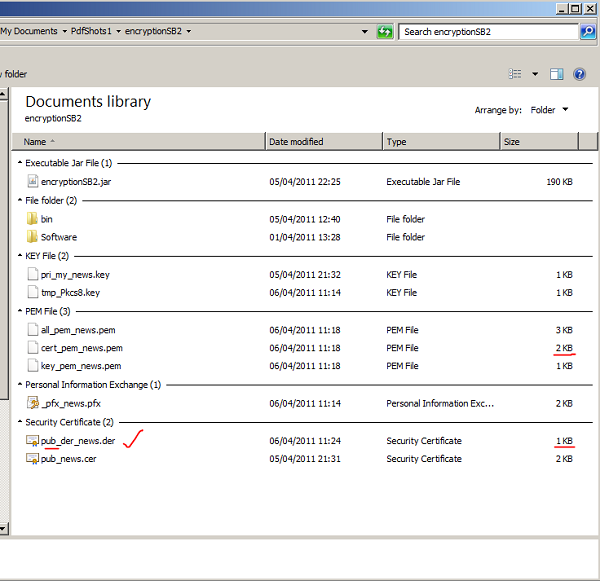
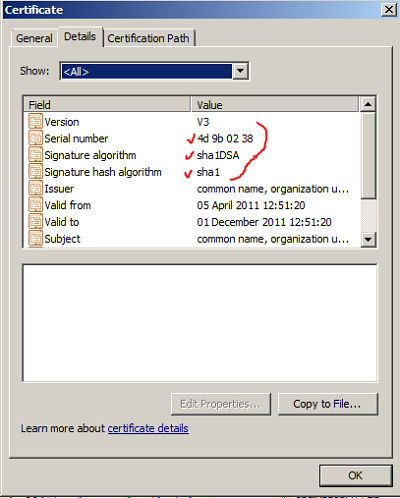
If you double click on your DER file Windows prompt for its export. It shows all the specifications of the file, as well. My key algorithm was RSA as it shows. Yours depends on creation of your key pairs. You can use the other tab of this tool to create any type of key pairs.
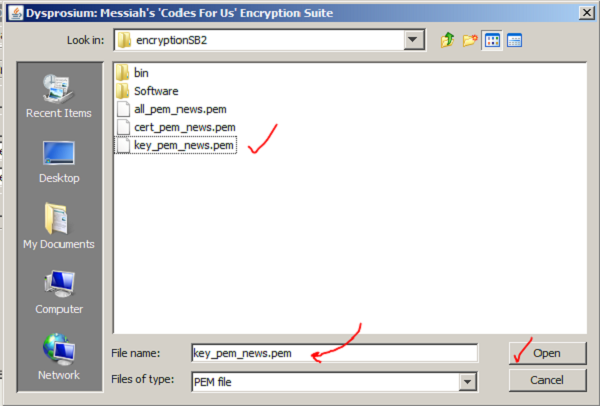
In a separate session you can convert your private key PEM to a DER format, if you like. Please follow as before by clicking on "Get Pem" button,brows to the folder that you have your private PEM formatted key
Fill two relevant text field as before and click on "Private Key" radio button. Then click on "Create DER" button.
For private key pkcs#8 standards allow imposing a password for exporting the file, optionally. If you do not like to impose that password, please clear the password field.
You have your private key in DER format now.
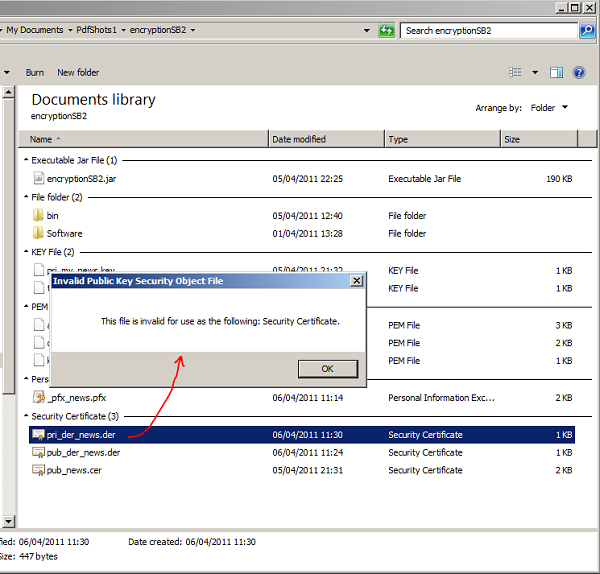
If you double click on that Windows recognises it as not a certificate.
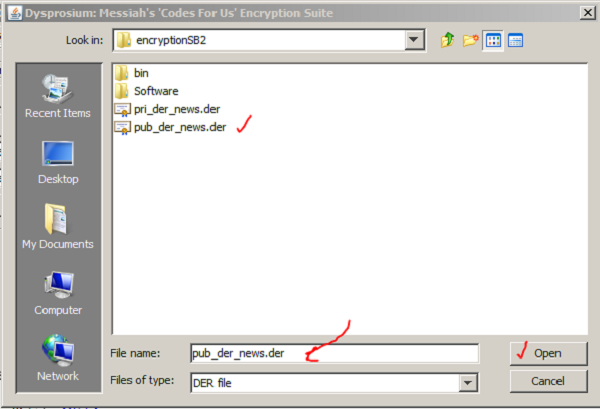
Next, in the same session or later from any DER file in correct format created by any means java key stores or otherwise, you might like to create PEM formatted file.
Click on "Get Der" button to brows to its directory. I select a public key DER cert or a combined public/private file.
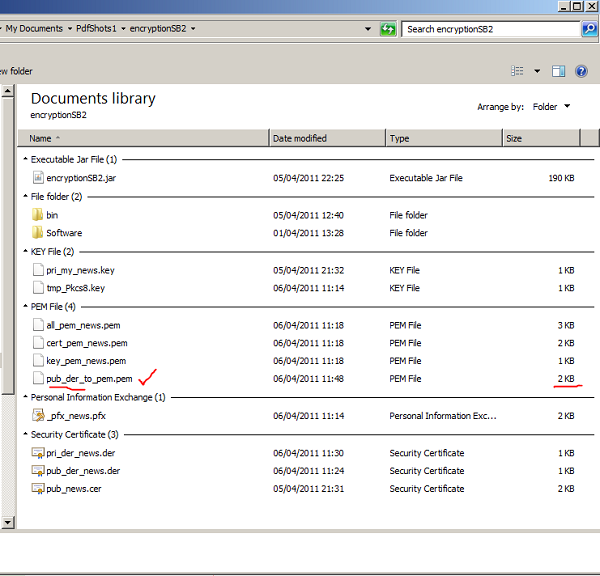
Please fill text fields for the DER input file password and select a name for the created DER file and click on "Create DER" button.

PEM file comes into the directory.
In a separate session you can convert your private key DER to a PEM format, if you like. Please follow as before by clicking on "Get Der" button,brows to the folder that you have your private DER formatted key.
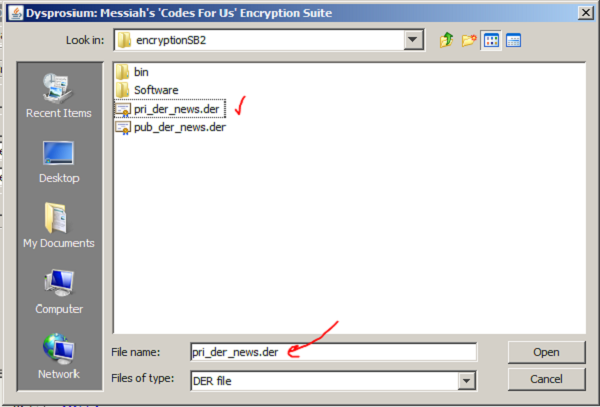
Fill all the requested text fields. Click on "Private Key" radio button. Then click on "Create PEM"
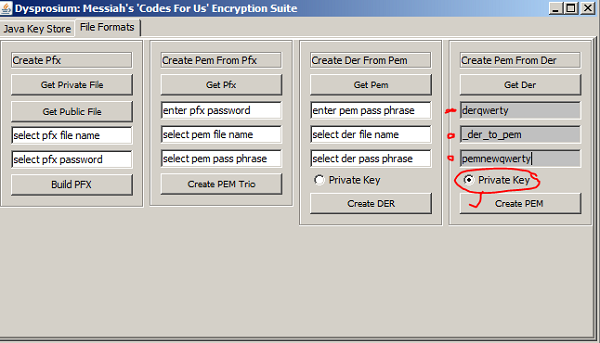
You have PEM private key in the folder.
When files are not in the binary form and are human readable you might like to change their file extensions to ".txt" and study their contents for further information.

This page is maintained by Peter Jones, a Welsh mariner
No table is used in layout of this page; only Div tags.
First created
Last quality revision (of Web page by W3C Validator)
Optimised for ![]()
![]()
![]()
![]()
![]() HTML5, CSS3
HTML5, CSS3
Last updated
Number of downloads at this date

10:20 01/06/2010
18:40 21/11/2013
18:35 21/11/2013
19:19 01/04/2014
exceeds 36,000

